Friday, May 31, 2013

Vintage Circus Party

My 13-year-old has discovered Pinterest. 
For her birthday party this year she came up with the theme "Vintage Circus," 
after she had pinned several ideas on her board.
 So I went to work to figure out exactly what Vintage Circus meant in terms of decor and party food! 
I found great party supplies in the $1.00 bins at Michaels, like the plates and napkins you see here.
In addition to the items you see in the picture above, we served 
warm pretzels, chicken wings, lemonade and watermelon.
I created this invitation in my Silhouette software. 
 My chalkboard art designed just for the party. 
You can read my post here on how to create your  own chalkboard art!
 Aren't these the cutest little cupcakes ever! I found the liners at Michaels. 
The popcorn top is actually marshmallows with the tops cut 
and then sprayed with Wilton's yellow food spray.
 I found the tickets at the dollar store 
and the red and white chevron straws I ordered from Pick Your Plum.
 Cotton Candy from the dollar store.
Circus peanuts, real peanuts and animal crackers (which I later stuck in the goodie bags).
More animal crackers in a jar (I love these things and find them very addicting!) 
The striped table cloth is actually a large piece of fabric I had cut at Wal-Mart.
As you can see I had no trouble with this Vintage Circus theme (surprise surprise!)
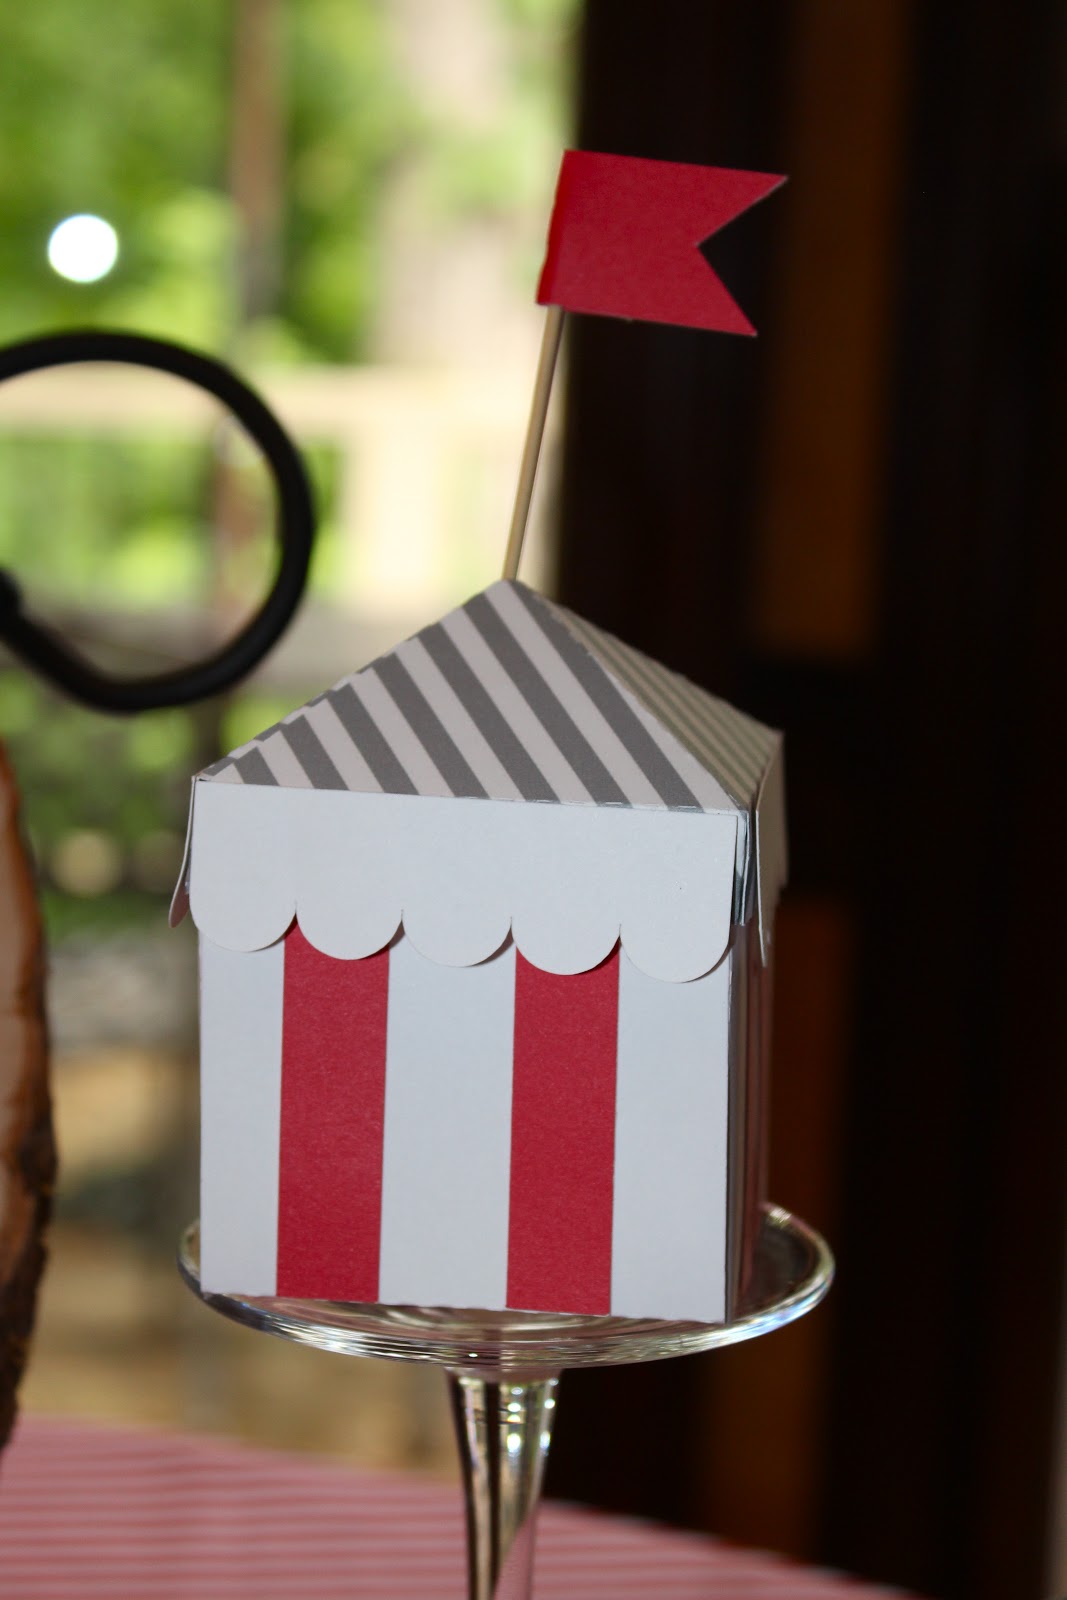
 I found these little Circus Tents in the Silhouette store.
They were so easy to put together and I had fun changing up the patterns too.
I made the banner with burlap, clothes pins and scrapbook paper.
I feel like we can use this banner for other parties as well 
(it is not so super specific to the Vintage Circus).
Sid and her friends had great fun at the party and even more fun in our homemade photo booth!

Monday, May 13, 2013

Chalkboard Art tutorial

As promised,
I'm going to show you how I transfer a design to a chalkboard.
I painted this wood slice (found at HL) with chalkboard paint.
To season the chalkboard, I rubbed the side of a piece of chalk all over the board.
Once the whole board is seasoned...
Use a damp cloth to wipe off all the chalk. Don't use a paper towel, it leaves leftovers behind!
The first time around I had to clean off the board twice. 
You don't want to get it too wet. But you don't want to use a dry cloth either.
Next take your design and that same piece of chalk.
Turn over to the backside and rub chalk all over, 
focusing on the areas that you want to transfer to the chalkboard.
Turn it back over, right side up. You may want to tape your paper in place too.
The next step is to trace the image. 
The chalk on the backside of the paper will transfer to your chalkboard.
I like to use a red pen so I can see where I've traced.
As you can see you get a nice outline of everything you've traced, right there on your chalkboard!
This takes a little bit of time. But I love how everything comes out so crisp and clean!
This is the best tip ever! You can sharpen your chalk!!! Check  out that nice sharp tip on the chalk!
Now I take my nice sharp chalk and trace over the outline of all the letters.
I love how clean the lines are!
Now that I've got everything outlined. It's time to fill in the letters.
You don't necessarily need a sharp time for this next step because you're just filling in the letters.
I use my finger to rub some of the chalk inside the letters (this is another one of my favorite tricks!)
Gotta love my husband and my daughter the photog's who stood by documenting every step of this tutorial. Here I am blowing off some of the extra chalk dust.
I also used a wet q-tip or corner of a towel to clean up some of the chalk dust in between all the letters.
I use the tip of my finger too! This gets to be quite a lengthy step for me. 
Correcting and making it look just so!
 Pretty simple!
 I grabbed this little plastic box (actually for a sandwich!) at the Dollar Store.
 I've got everything I need here (minus the towel-which wouldn't fit in here and needs to be washed occasionally) "chalk" sharpener, colored chalk and white chalk, q-tips and makeup sponge.
This is my best project to date! I created a document with my 
Silhouette Software and Photoshop and then emailed the image to my local Office Depot. 
They printed it out BIG (mine is 22 x 30 or something, you can get it any size you want!) and because it was black and white (I added the colored chalk when I was filing in the letters)  
it cost me less than $3.00!

Saturday, May 4, 2013

Chalk Painted Armoire

Every once in a while I get that itch. 
The itch to paint something.
 I had one of those days recently and this was the result:
 When we were first married we'd frequently visit the auction house.  
We purchased this one of those times.
 And this is the 4th time I painted it!
 I used Cece Caldwell's Chalk paint in Pittsburg Gray. 
The fun pop of color on the inside is Pantone's color of the year (2011) Honeysuckle. 
 This is by far my favorite look for this armoire! 
 The glass knobs are from Hobby Lobby.
 I had to put some my French to good use too!
BEFORE:
AFTER:
For more on chalk board see my post here about my kitchen table transformation.

Simple Spring Wreath

If you've got 7 minutes and a couple bucks, you too can make this Simple Spring Wreath! You'll just need a couple supplies fr...