Wednesday, October 21, 2015

DIY Plush Fabric Pumpkins

 Aren't these just the cutest little things?!
These adorable little pumpkins are easy to make and I'm going to show you how!
 I grabbed my girlfriend and 1/2 yard (each color) 
of this minky soft fleece at my local Hobby Lobby. 
We gathered up the following supplies and then got to work; 
Thread in my three colors and a nice thick-ish needle.
Dry beans (for weight). This is what I had in the pantry. Any kind of bean will do.
 Pumpkin stems (found at the bottom on the bin where pumpkins are sold!) 
You can also use sticks, they'll look cute too!
Two large trays (19" and 16") and a dinner plate to trace for each size pumpkin.
You'll also need some polyfill (stuffing) or plastic bags and a glue gun.
 Start by tracing out your circle on the back side of the fabric.
 I used this fancy Disapearing Ink/Mark-be-Gone pen (found at craft and fabric stores), 
but you could use a pencil and it would work just the same.
 Cut out the fabric circle.
 Stitch around the fabric circle with big wide stitches so it's easy to gather.
 When you come back around to where you started, pull the thread to gather the fabric.
 Before you close it up, add a handfull of beans 
(maybe 1/4 to 1/2 a cup depending on your pumpkin size). 
Then add the polyfill or pastic bags.
 Close up the hole by hand stitching back and forth. 
Making it nice and tight so it's hard to see the seam.
Hot glue your fabric stem to the top of the pumpkin.
 Voila! 
And in no time at all you can make a bunch of theses adorable Plush Fabric Pumpkins!
 This could be a great project to get the kids involved in too!
 I love displaying them in a group.
Between my friend and I, we each made 8 and I still have some fabric left!
Happy Fall Y'all!

Friday, September 18, 2015

DIY Area Rug

Here's a little story about thinking outside the box when it comes to DIY Home Decor.
I came home from my typical shopping at Target where I grabbed this rug that 
was on clearance for $2.98  (the picture below is what you'd find in the online Target store).
I had planned to put it by our back door. Until my husband said (out loud) 
"Why don't you buy more of those and sew them together."
Oh My Goodness, YES! I think I will.
I went on the hunt to gather more rugs, I figured I'd wanted 3 rows of 6 rugs. 
For a total of 18.
Luckily I live where there are several Targets within a 15-20 mile radius 
and I was able to collect all 18 and for the clearance price too!
Using the large needle and nylon "yarn" I sewed the right sides together, for a total of 6 in a row.
I used a simple stitch just to keep the rugs from separating. 
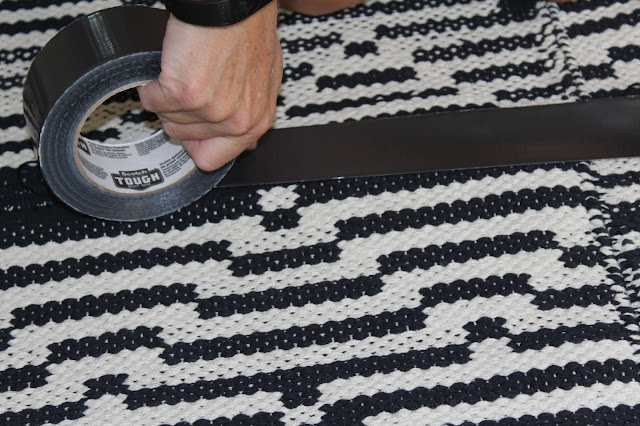
And then I pulled out the "TOUGH" Duct Tape by Scotch.
I used the tape over each seam. I figured this would help the rug not to slip when I had it all together.
Half way there!
 I sewed my three rows to each other and Duct tape on the back of each seam.
 I'm so pleased with this easy and inexpensive rug. Feels great on my feet too!
I never could have found a rug in similar size for the price of paid for this project!
Ginger approved!

Monday, September 14, 2015

Easy Twigy Picture Frame

How cute is little twiggy frame? 
I needed a little something for a party honoring two 11-year old girls and I thought this would be the perfect thing.
Here's how I did it; I gathered sticks from my yard, roughly the same thickness and thin enough for me to break with my hands. Hot glue gun, twine, sissors, and cardstock.
I cut my piece of cardstock 4 x 6. This will be the backer of my frame and also serve as the pattern for the twiggy border.
I laid out my stick around the cardstock and hot clues them together.
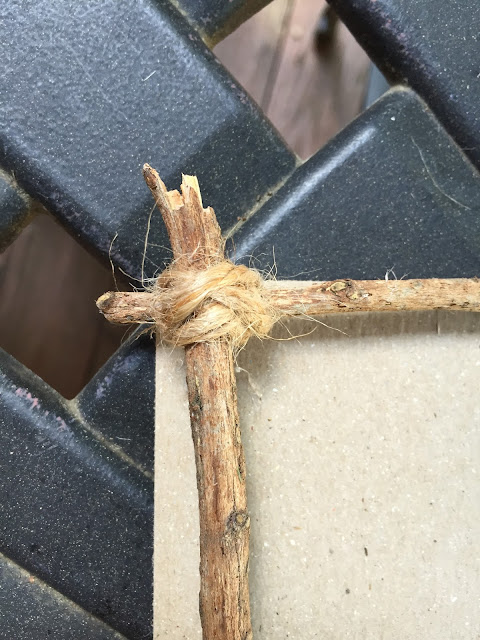
And then wrapped twine around each of the four crossings. 
Using the hot glue to attach the twine at the beginning and endings.
Katelyn and her friend Halle each made 5 frames for the party.
Because I was using copies of oicturess, I just out a small dab of hot glue to the back of the picture and secured it to the twiggy frame.
I used another small scrap stick to create a little stand so my frame can sit up on its own.
And the


Friday, August 21, 2015

Sand Bowl

Summer is coming to an end and it's time for one last DIY project that is virtually free!
This is a fun and easy project for DIYers of all ages!
 With all the school glue on sale you could pick up a couple extra bottles 
and some sand from your last summer trip to the beach.

 I grabbed the following supplies:
 a plastic disposable cup,
plastic disposable spoon (for stirring),
 beach sand (or you can buy it at your local craft store),
plastic wrap,
 bowl
and white school glue.
 I started by wrapping the kitchen bowl with a couple layers of plastic wrap,
covering the entire bowl.
Add some sand to your plastic cup and then start pouring in the glue.
Mix equal parts sand and glue. Start stirring with your plastic spoon.
Until you get a nice consistency. 
*NOTE: the above picture shows you that the sand/glue mixture is TOO thick!
 Here's a picture of sand/glue mixture that is too thick (left) and just the right consistency (right).
And here's me getting giddy excited about the latest DIY project.
Start pouring your sand/glue mixture over the bowl.
I used my spoon (fork in this case-it's what I had!) to smooth out the sand/glue. 
You may or may not need to smooth it out.
The mixture will drip down the side. I ended up pouring on 3 coats, 
letting each coat dry about 12 hours in between.
It's a great place for me to display my beach glass treasures.
No two bowls will ever look alike.
I think it's a unique little craft that just about anyone can do!

Simple Spring Wreath

If you've got 7 minutes and a couple bucks, you too can make this Simple Spring Wreath! You'll just need a couple supplies fr...